25 Nov Winter Survival: Fire Starting Part IV
This is the final post in our continuing series on Fire Starting.
Fires and Fuels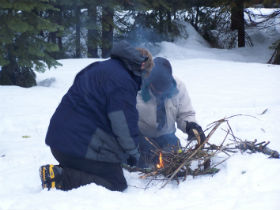
There’s more to making a wilderness fire than you might think, especially in adverse weather or at night. It’s not going to be easy like starting one at a summer campsite or in your home fireplace. There are some variables and extra procedures to take into account before and after you strike that match.
Do I need a fire?
If fuel is limited or it’s raining, or winds are very strong, a fire may not work or be of much use. It would be better to get out of the elements, stay dry and generate heat in a vehicle/shelter. Depending on survival priorities, there may be other tasks you need to do before building a fire. But if someone is wet or hypothermic, first priority is getting them warm via a fire or other heat source. Let’s say it’s critical you start a fire and conditions support one.
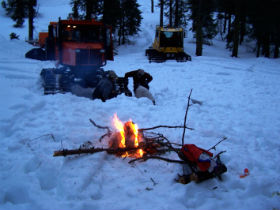
What’s the best location?
Find a spot that’s sheltered somewhat from the wind like among trees or leeward side of a large rock face, boulder or other natural barrier. Build close to your vehicle but not so close you torch your fuel tank. Check what’s around and above your fire spot. Don’t set up in a drainage or under snow covered limbs. Gather up all sizes of fuel from kindling and small limbs to medium sized logs. Don’t start a fire with just kindling and run off to find more stuff, it could go out. Once the fire is going, one person needs to tend to it until some large logs are burning.
Fire Building Tips
People spend 10-15 minutes building miniature teepees and “log cabins” of kindling but then their match snuffs out as they jam it into the center of the debris or it never catches hold. In our Safety One Winter Survival training courses, we’ve often had only 1 in 10 students get a fire started in the field using one match and what nature provides. Skip the fancy stuff, keep it simple and be quick about it. Here’s a technique I’ve found to always work when there are adequate natural fuels. Lay a couple 1-inch thick sticks parallel 3” apart. Put a small piece of trioxane between them and light it. Lay a handful of small, long twigs across the sticks and you’ll have a fire going in about 30 seconds. Add kindling, small sticks then limbs and bigger logs until your fire is self sustaining. Simple and effective. Get a medium fire going and you may be able to dry out larger, wet logs. If feasible, build a windbreak/reflective back wall upwind of your fire and line the front with a gold/silver space blanket to bounce back radiant heat.
Don’t Let It Go Out
The last and most important step after getting a fire started is don’t let it go out until you want it to. Easier said than done. Maintaining one takes work. Fires consume huge amounts of fuel over long periods. Stockpile enough wood for a few hours of burn time and replenish as needed. If you plan to keep a fire going all night, collect a large supply of logs before dark and take shifts tending the fire. Don’t waste time cutting trees into 16” logs, you’re not selling them. A field expedient to cutting logs is place a dead tree (> 8-10’) horizontally between a fork like two trees or large rocks close together and push until the tree breaks. You can lay tree sections (< 6-8’) diagonally against a fallen tree or boulder and smash with a large rock. Or skip the labor and lay long logs across the fire. As they burn in half toss shorter sections onto the fire. Can also put the ends of half a dozen long logs into the fire like spokes of a wagon wheel hub and keep pushing the logs inward as the ends burn up. A “trench fire” is a technique where you dig a shallow slit trench 6’ long, 2’wide and less than a foot deep. Or arrange rocks in a 6’x2’ rectangle. After getting a fire going, extend it the length of the trench with long logs. Two people can lie parallel along its sides through the night in moderate weather. Once you have a good fire going, warm up, dry your clothing, and melt some ice/snow for water.
Besides wood fires, there are other flame and heat producing options you can apply in a survival situation. These are vital when you can’t sit around a fire and need to hunker down in a vehicle or shelter. Where there’s fire, carbon monoxide is a major concern but certain products can safely be used in confined spaces. 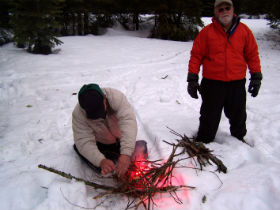
There are many details to these situations and a simple blog post is no substitute for training. If you want to learn more, attend our Winter Survival Training on December 9 in Littleton CO for $150, or any of our 4 day Snowcat Operator Training courses this winter. Contact the office at-1800-485-7669 or email [email protected] for details.
Stay warm, stay dry!
Nick Weighton
Safety One Instructor, Lieutenant Colonel, Special Forces, U.S. Army (retired)
No Comments